Table of Contents
Overview #
Custom Safety Zones unlock the ability to deliver customized driver alerts anywhere they would like and analyze driving behavior in specific areas.
Create, edit, and deactivate custom safety zones in the Drivewyze Hub.
Creating a custom safety zone #
- Log into the Drivewyze Hub.
- Navigate to Custom Safety Zones.
- Click Add Safety Zone.
- Select a goal for the safety zone:
Alert Only: Show driver alerts
Analyze Driving Behavior: Monitor speeding and visit frequency without an alert
Alert+Analysis Zones: Show an alert AND monitor how drivers react to alerts. This enables Custom Zone Insights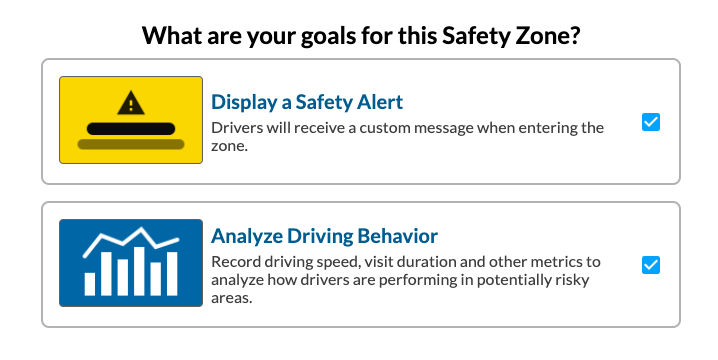
- Select the zone type that best reflects the type of safety zone. This selection determines the appearance of the alert icon.
Learn more about zone types.
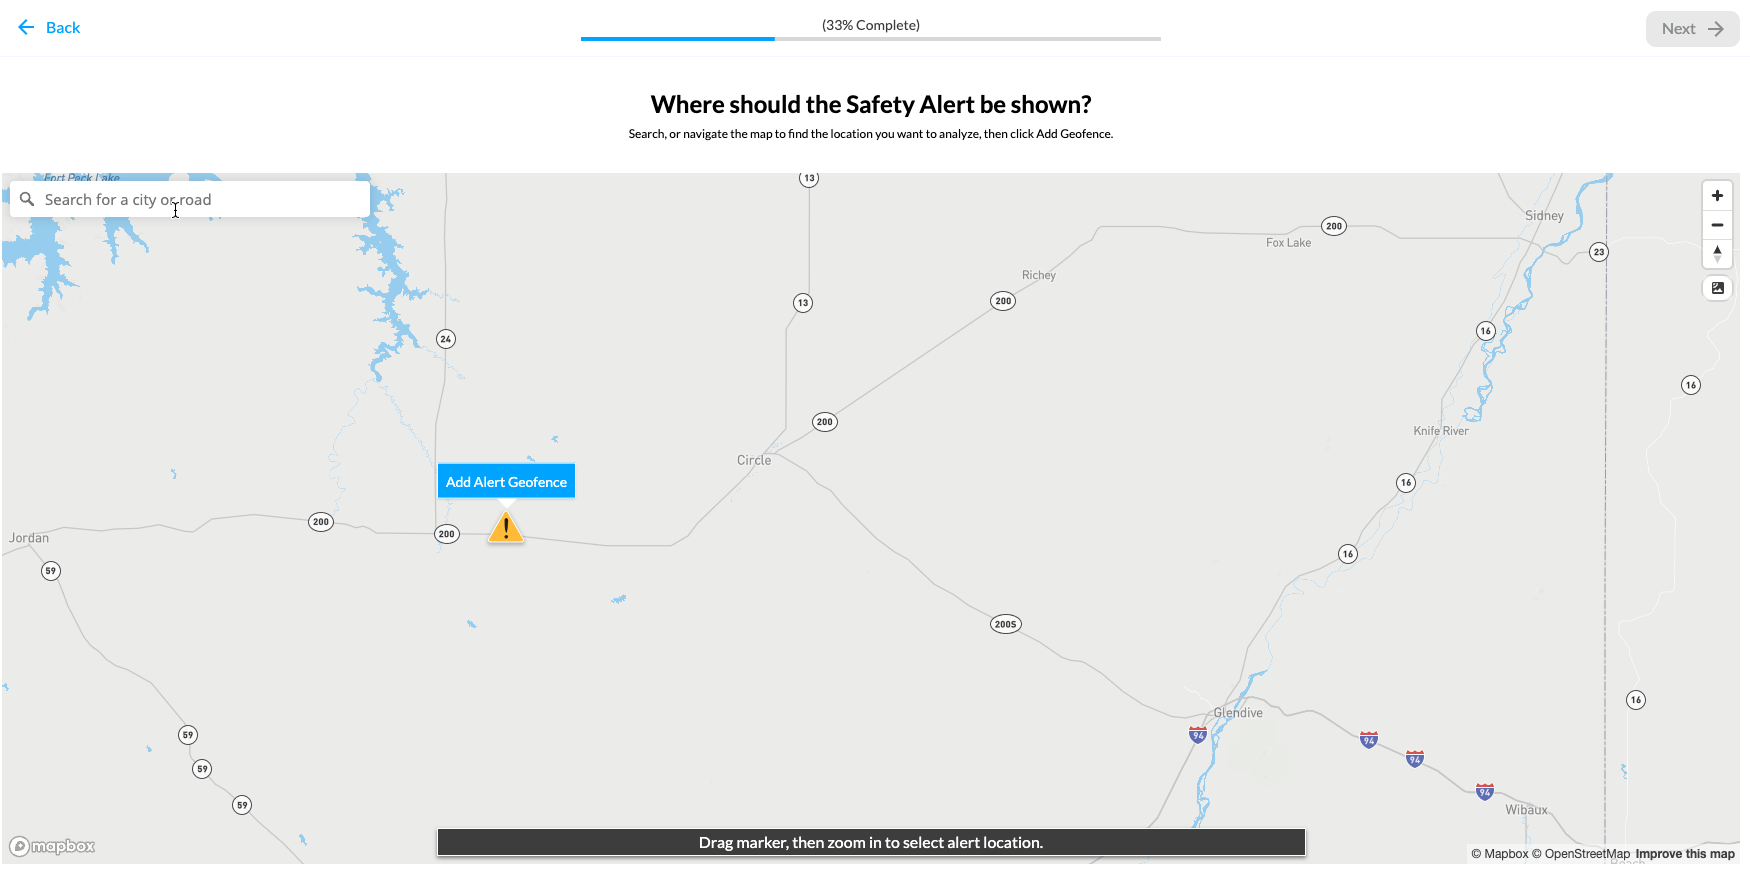
- To add an alert, set up the alert geofence. Click Next when the following steps are complete:
a. You can drag the yellow icon to a location, or use the address search to find a good starting point
b. Drag the yellow icon to the point where you want an alert to appear
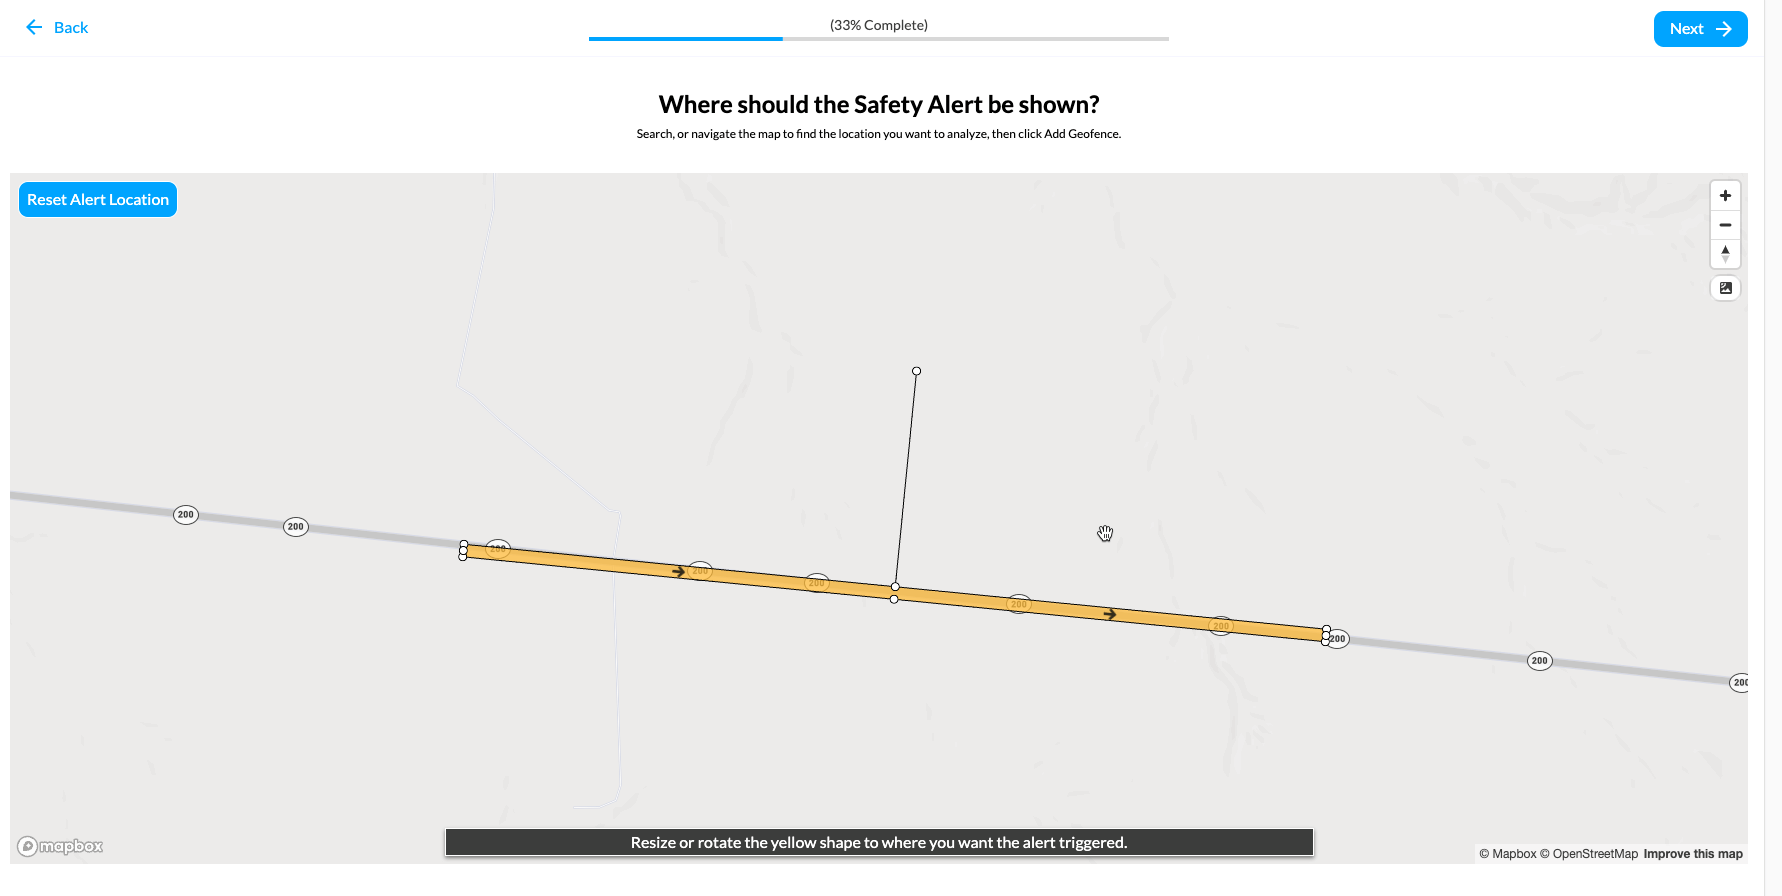
c. Click Add Alert Geofence. If adding an alert, setup the Alert Geofence.
d. Resize, drag, or rotate the yellow rectangle.
e. Switch to satellite view if it helps locate the road segment
Note the directional arrows! Be sure to place the rectangle over the side of the road with traffic moving in the chosen direction

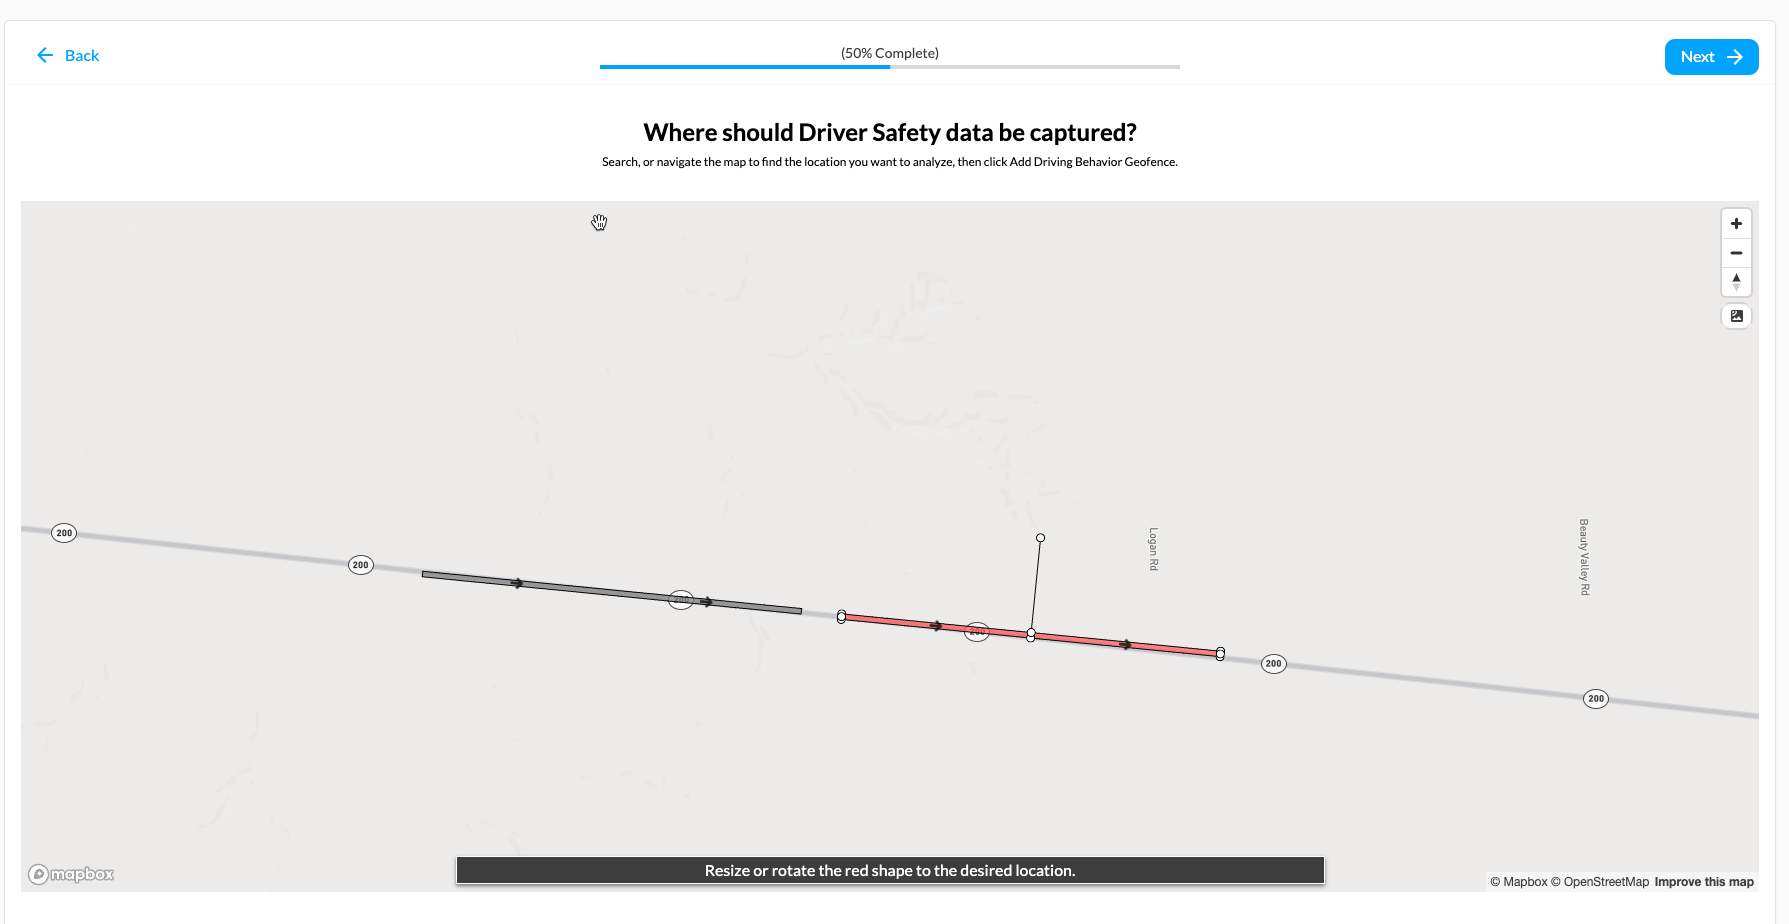
- If Analyzing Driving Behavior, the Risk Data Collection Geofence is automatically placed down the road.
Resize, rotate or move the zone to the area where you want to capture driving behavior. For example in a curve, place this over the curve, or in a speed zone, place it further down the road to see if the driver actually slowed down.
- If adding an alert, enter the Driver Message.
a. The Title is required (max 25 characters)
b. Optionally add a message. The message will show below the title.
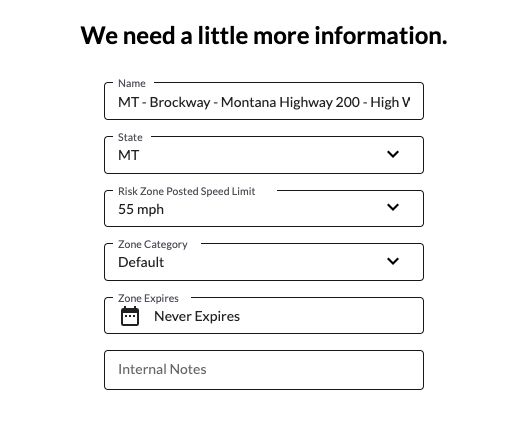
- Confirm the site information.
Name: Must be unique
State: Defaults based on the geofence
Risk Zone Speed Limit (Required if Analyzing driving behavior)
Category: An easy way to group zones for reporting purposes
Zone Expires: Choose when the risk zone expires
Internal Notes: Add notes to add context about the zone
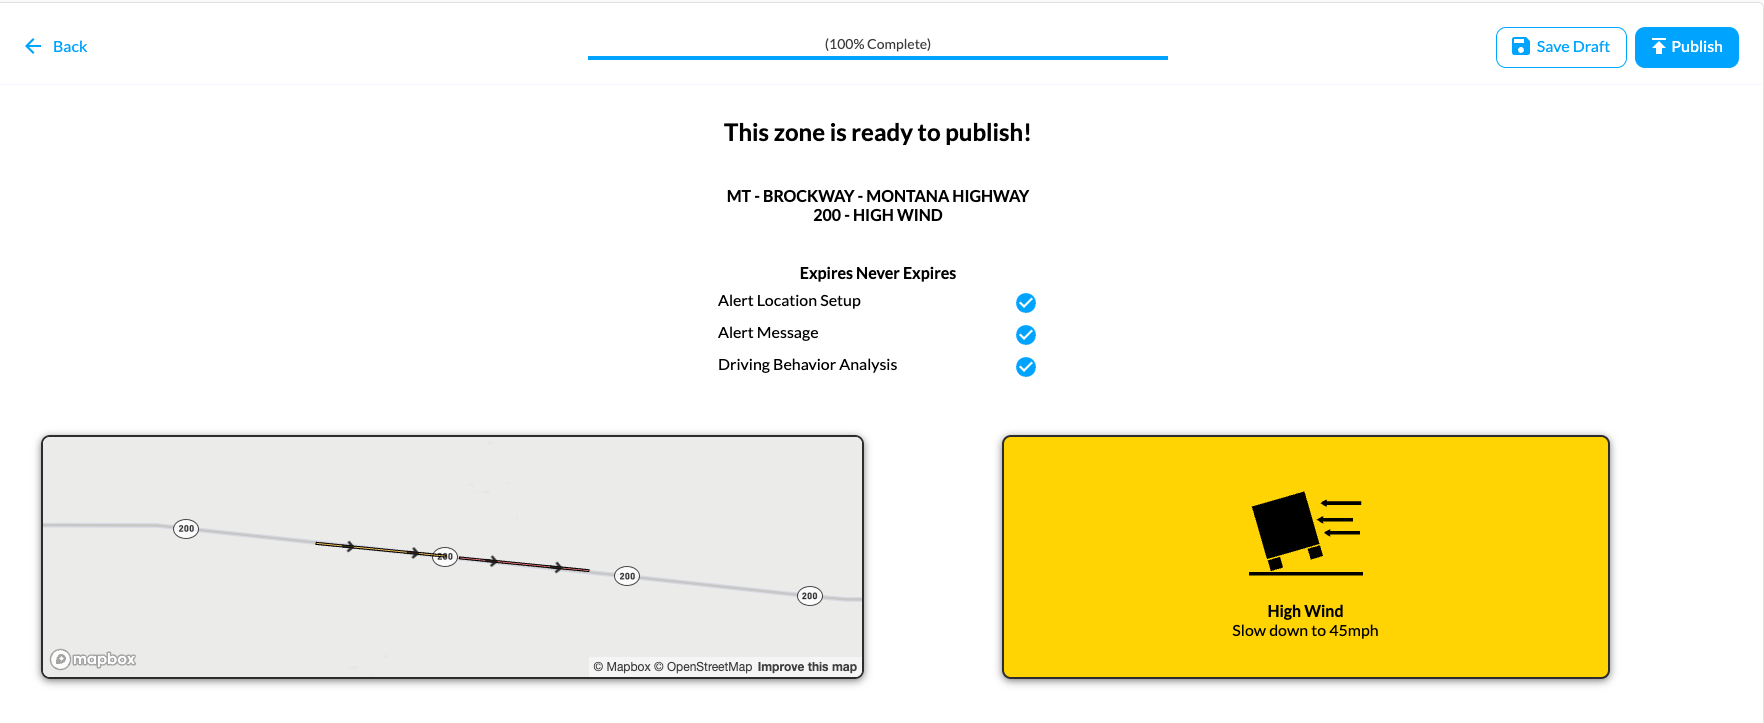
- Review and Publish the site.
a. Confirm the details, and click Publish
b. If you want to save the zone for later, or review it with someone first, select Save As Draft. You can choose Publish from the Custom Zones list later.
c. Custom Zones will begin syncing within an hour after being published.
Editing custom safety zones #
- Log into the Drivewyze Hub.
- Navigate to Custom Safety Zones.
- Click Edit.
- Edit zone information, status, the zone locations or the message.
- Click Publish Changes to make zone edits live in the cab. Changes will take up to an hour to sync.
Deactivating custom safety zones #
- Log into the Drivewyze Hub.
- Navigate to Custom Safety Zones.
- Click the three dots next to the zone you want to deactivate.
- Click Deactivate to deactivate the zone.
- After a custom zone is deactivated, the driver no longer sees the alert and Drivewyze no longer collects analytics data at this site.

